This document will cover how to whitelist our simulated phishing email servers in Office 365.
SECTION 1: SET UP YOUR IP ALLOW LIST
Step 1:
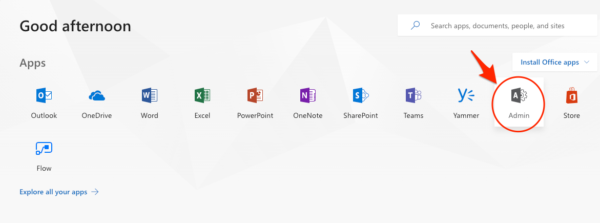
Log into your mail server admin portal and go into the Admin -> Exchange area.
Step 2:
Click on Admin -> Exchange.

Step 3:
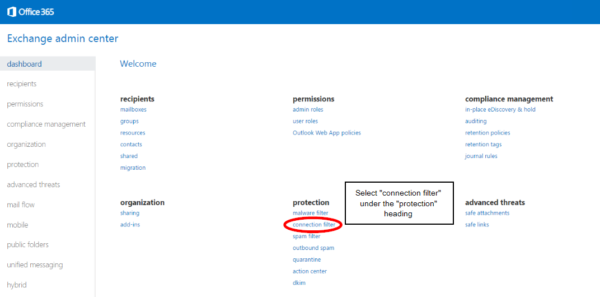
Click on Connection Filter (beneath Protection heading).
Step 4:
Click on Connection Filter, then click the Pencil icon to edit the default connection filter policy.

Step 5:
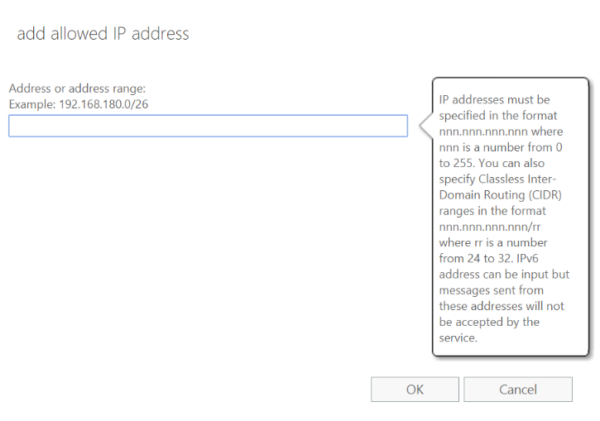
Under the IP Allow list, click the + sign to add an IP address.

Step 6:
Adding our IPs to your Allowed IP list:
Step 7:
Click OK, then Save. Next, you will want to set up a mail flow rule to allow our mail to bypass spam filtering and the Clutter folder.
SECTION 2: BYPASS CLUTTER AND SPAM FILTERING
To ensure our messages will bypass your Clutter folder as well as spam filtering within Microsoft’s EOP, you can follow the steps below.
Step 1:
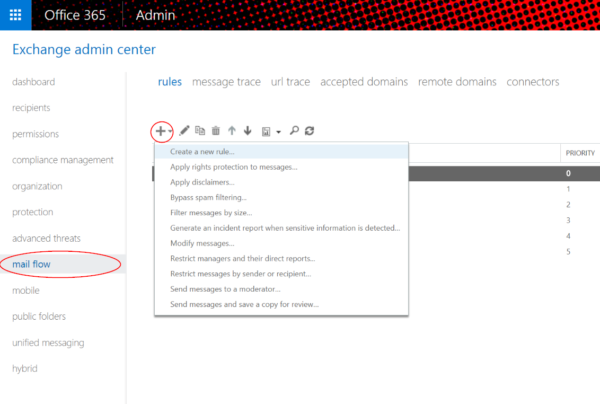
Go to Admin -> Mail -> Mail Flow.
Step 2:
Click the (+) Create New Rule button beneath Mail Flow -> Rules.
Admin Center:
Step 3:
Give the rule a name, such as (Bypass Clutter & Spam Filtering by IP Address)
Click on “more options”
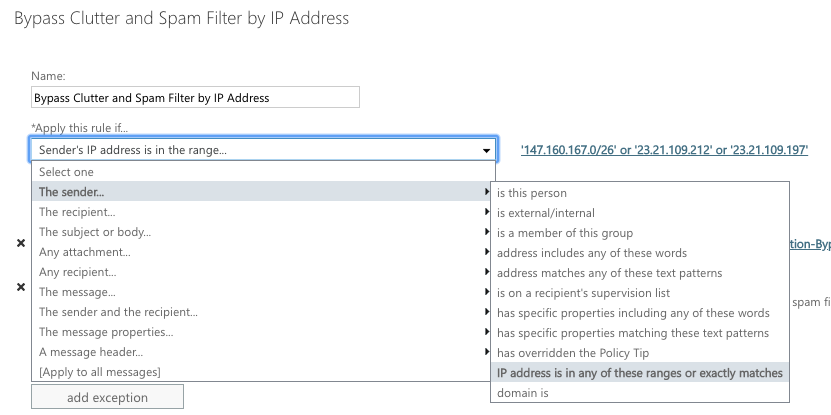
Add the condition “Apply this rule if….”
Select “The sender”, then click on More Options and select “IP address is in any of these ranges or exactly matches:
New Rule Screen:
Step 4:
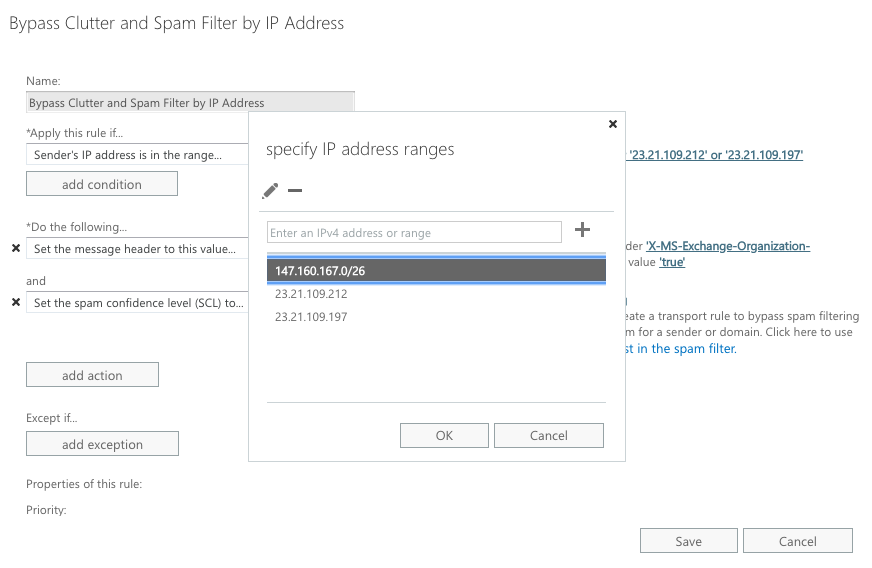
Specify Sender IP addresses:
Step 5:
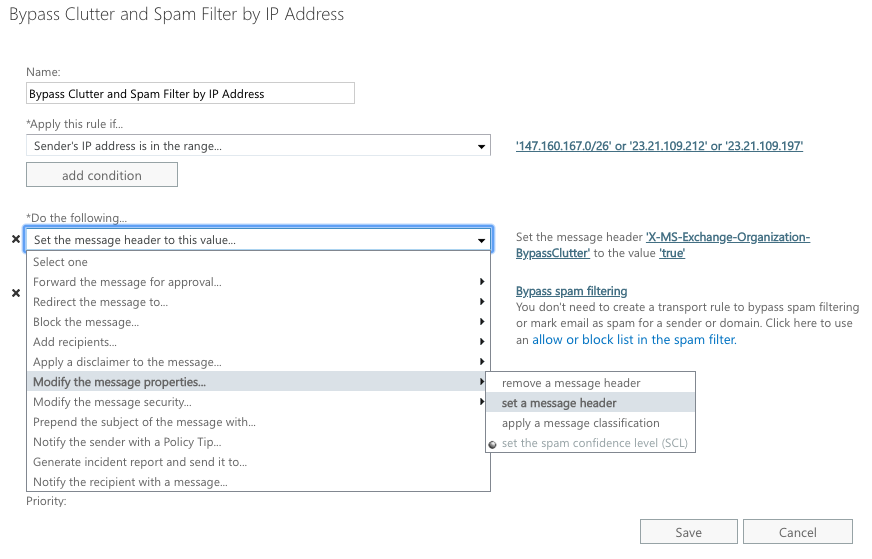
Beneath “Do the following”, click “Modify the message properties” then “Set a Message Header”
Modifying the message properties:
Step 6:
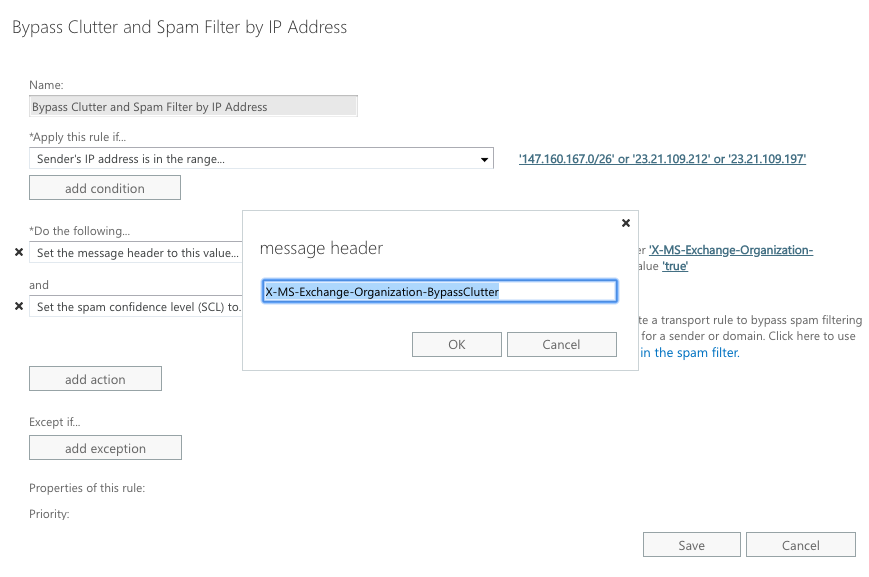
Set the message header to this value:
Set the message header “X-MS-Exchange-Organization-BypassClutter” to the value “true”.
NOTE: Both “X-MS-Exchange-Organization-BypassClutter” and “true” are case sensitive.
Set the message header value:
Step 7:
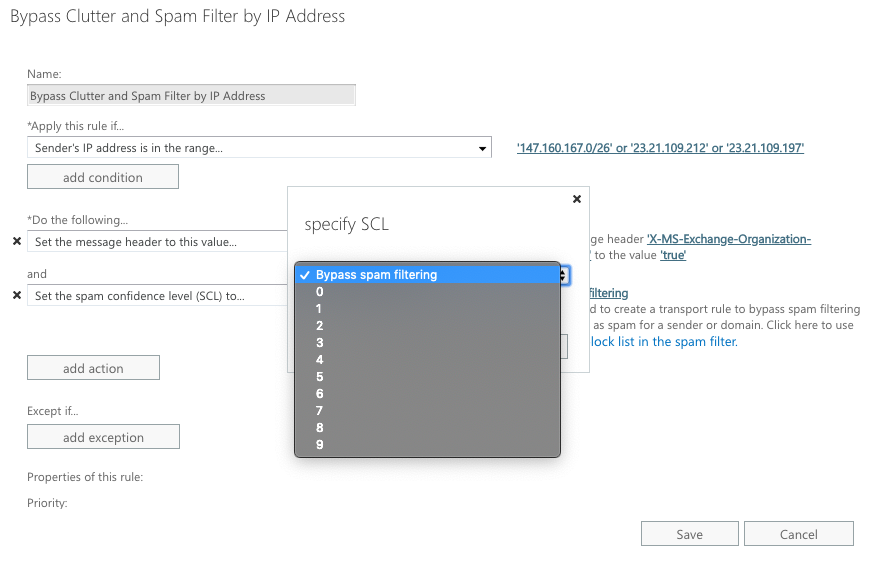
Add an additional action beneath “Do the following” to “Modify the message properties”. Here, click on “Set the spam confidence level (SCL) to…” and select “Bypass Spam Filtering”.
Bypass Spam Filtering
Step 8:
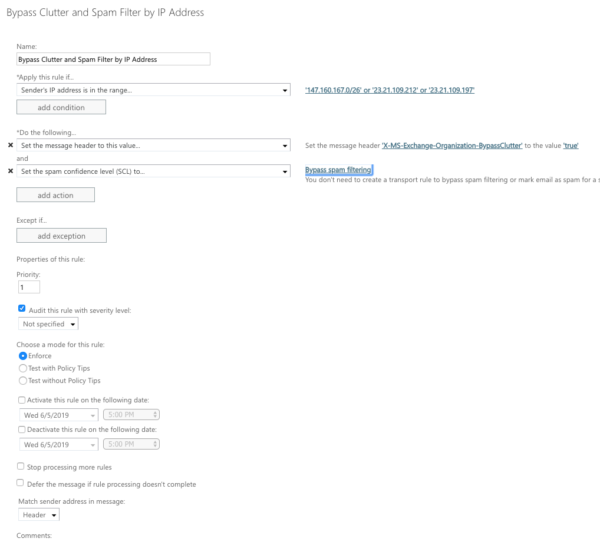
Click Save. An example of the completed rule is below.
Completed Mail Flow Rule
 Jeff Williams
